
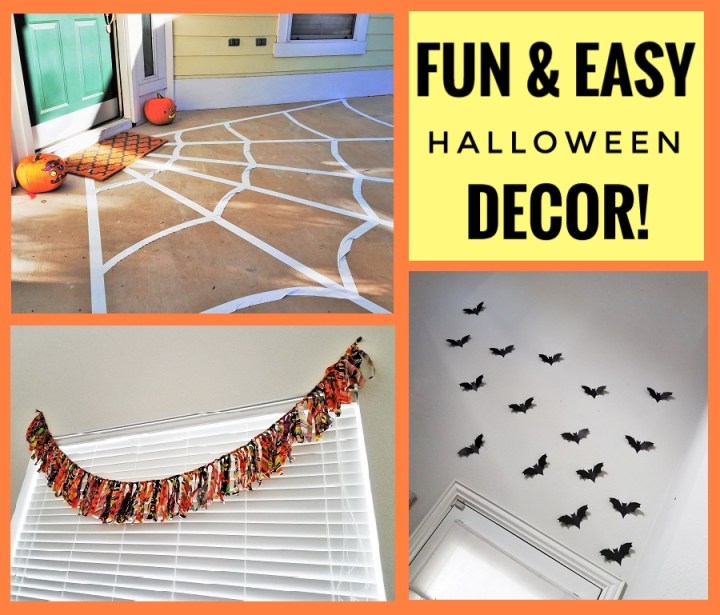
October is Here! It’s time to get crafty!
Ok… if you’re like me, you want to get crafty Everyday! October is just an excuse to create a surplus of amazing things.
If you’re Not like me, the idea of crafting may just frighten you more than… lighting the Black-Flame candle!
Fear not dear friends. DIY-ing doesn’t have to strike terror in your heart. I’m about to show you a some Extremely Easy and Inexpensive decor ideas to spookify your home… or office… or classroom! (Basically anywhere you want to bring a little Halloween Style!)
A little backstory:
I am Big into fall. I’m crazy about this season! My birthday actually falls on the first day of Fall. I feel connected to this season; the weather, the colors of changing leaves… the magical combination of nutmeg, ginger and cinnamon… football and fireplaces and fashions and Pumpkins… I love it, I love it, I love it all!
Each October I don’t necessarily decorate with the scary side of Halloween. With 2 small kiddos, I embrace more Spooky/ fun things. If it’s decor I can keep up past October 31st, that’s even better!
So let’s start with that.
This Window Garland can be made with any fabric you choose. I made this in late September 2017 and kept it up until the first week of December!

Here’s what you’ll need:
- Scissors
- A ball of yarn
- Fabric!
You can use any color of fabric at all! Why not upcycle some clothes you were going to give away?
I like to buy “Fat Quarters.” You can find these at any craft store. Fat Quarters are usually 18″ x 21″ cuts of a yard of fabric. It’s scrap fabric and each one costs about $1! (Walmart is my favorite place to get these. Just head to the fabric section!) Sometimes you can find fabric remnants at low prices at Joann’s, Michaels, or Hobby Lobby. But any time of year you can find fat quarters like these or these below at Walmart.

Using your scissors, cut the fabric into thin strips. It doesn’t have to be perfect! If you’re using fat quarters, you will be able to get about 42 9in x 1in strips out of 1 fat quarter! Do this by folding the fat quarter length ways. Cut 20 evenly spaced slits along the fold. Aim to have the slits approximately 1 inch apart. Next, cut along the length-ways long fold. This separates each side into 9in wide (21 inch long) rectangles.
Cut the rectangles into strips, using the small slits you made before as a guide. End result will be 40-42 9in long, 1in wide strips, ready to make into garland!
Have I mentioned: It doesn’t need to be perfect!
Take your time with this! Rushing through cutting your strips can easily result in mistakes (speaking from experience here!)
After you’ve cut all of your fabric into strips, it’s a good idea to plan what order you’d like them in! 
The more neatly you lay them out, the easier it will be to keep track of them!
Next, it’s time to grab your yarn!
I recommend measuring your window using your yarn. I’ve designed mine to hang gracefully from the top of the window, sloping down a few inches. There’s no rule saying you must do it that way.
Using your yarn, go to the window and stretch the yarn across from frame to frame. Add about 6 inches more then cut the yarn at that spot!
Next, cut 2 more pieces of yarn to be the same length as the first. Now, you should have 3 total equally long strands of yarn.
Next, knot the 3 strands together toward the end. 
Pull the knot tight. Continue to knot portions of these 3 strands of yarn. (I typically place each knot about 6 inches apart, all the way from end to end).
Hang on tight, because you’re almost done!
Now it’s time to tie each strip of fabric onto your yarn “cord!”
Bend the strip in half and place it (back-side-up) on a flat surface. Stretch the cord across the middle of the fabric strip.
Then, take the two ends of the strip and pull them through the loop at the top.
Pull those strips until the whole thing is tight (and pretty) against the cord.


Continue to do this with each strip. Space out each strip across the cord. There’s no need to crowd it!
Before long, you’ll have a delightful garland to hang! (I hung mine using super super strong push pins from Target!)
 You can adjust the “tassels” by sliding them along the garland cord to make sure they are evenly spaced! That’s it. Now go hang that sucker up!
Ready to take on something even easier? Grab your scissors!
Our next project will be the Flying Bats!
For this project you will need the following:
- Black Cardstock Paper
- Scissors, OR a cutting machine (I used my Cricut Explore Air; it’s a game-changer!)
- A Pencil (if you’re using scissors)
- Weeding tools (if you’re using a Cricut or other cutting machine
- One of the following images below!
- Scotch Tape! (double sided tape would be an excellent choice!)
For our classic Scissors users: You’ll simply PRINT this photo of a bat. {Right Click and Save it to your computer. Open it and ctrl+P to print!}
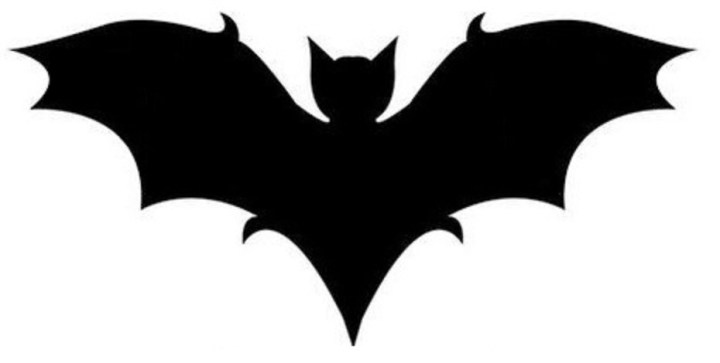
Cut out the bat. Then use it as a stencil! Using the pencil, trace the bat on black paper. When you have your desired number of bats traced out (10-20 bats would be fabulous), Cut them all out!

Tape the tummies of the bats to the wall and gently lift the wings while pressing the tummy firmly to the wall. This will give it the illusion of flight (or at the very least, give it a little 3D flare!)
For Cricut (and other cutting machine users):
Save this photo and upload it into design space (or your cutting machine equivalent). 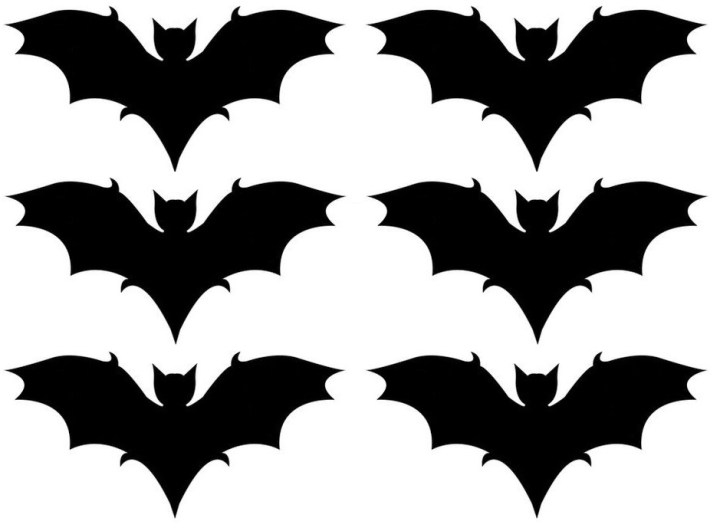
Cut it out on black cardstock. Gently lift each bat from the cutting mat slowly.
Tape the “tummies” of each bat to the wall and lift the wings toward you while applying pressure to the tummy. That’s it!! 
Doesn’t it give it a perfectly spooky touch? Have fun with this one. I like to place the bats as if they are flying away from something. Be inventive! Make it your own !
Our next project is all about imagination!
It’s a Giant Spiderweb for your porch! You’ll need just 2 things:
- White Duct Tape
- A porch!
Last year, we lived in what I consider to be my dream home. This year (last month in fact), we’ve moved into an apartment. I MISS my porch! I miss my balcony! So though I cannot demonstrate the steps for this Giant spiderweb in actual photos, I’ve made you a model as a guide to follow when creating it on your Own front porch (or driveway!)
First, Pick a starting point. The natural spot for our web to branch out from was the front door. Honestly, any corner will do!
Next, tape down the Long diagonal lines of the web. Start each one from the same point, then shoot them off in different directions:

Let’s call these pieces the Base of your web.
Once the base is down, you’ll want to place the inner “swoopy” pieces of the web. Start close to the starting point of your base pieces.


Place one side of the tape on the edge piece of the web base. “Swoop it” down in the middle. You want the “swoop to be an inch or two lower than where you attached it to the base (there may be a little crease or two). Form a U with the tape in between each long base piece. It only takes a few layers of “U” to create the spider web illusion!


It only takes a few layers, repeating that “U” shape to create the spider web illusion!

That’s it! (Didn’t I tell you these were all easy?)
So go and make it! Take advantage of October and create some lovely, spooky things!
Here are some other fun decorations you can bring to your house this October (courtesy of the Dollar Tree and some extra craft supplies I had lying around!)


I hope you’ve enjoyed perusing my Halloween decor inspiration! Get crafty and let me know how your projects turn out!

