
I dyed my White couch. It was terrifying, fantastically fun, and I love how it turned out!
A year ago at this time, we had just put our Charleston, SC home on the market. We were getting requests for 2 or 3 showings a day! Each time, I’d go into Turbo-Mom-Mode: I would tidy things up, gather the kids, pack some snacks, and vacuum perfect lines in the carpet. We’d head out the door to find adventure while potential home-buyers would tour my house
Any mother with small children will tell you: on a day to day basis, the house goes through cycles of messiness. Keeping the house immaculate, preparing for a move across the country, feeding small humans, entertaining and educating said humans… all of these things take time, patience and massive effort! To put it simply, we were moving. It had to be done!
We chose our realtor (Andy Green) and invited him over to chat and a walk through our house. There were definitely some things we needed to improve before we could put the house on the market. 2 weeks later, the house had been completely repainted. The carpets throughout had been replaced. Curtains were hung, furniture was moved. In short, I busted my big-ol booty to get our house (what I considered) magazine beautiful!
The day before they came to photograph the house, I went to a yard sale and found the missing element: a beautifully clean and comfy WHITE couch! I paid $75 cash and they delivered it to my house that evening!
This gorgeous couch brought everything together! 
It looked fresh and beautiful. It completed my living room!
Only one problem: I have 2 very lovable, but very messy children!
I could just imagine this couch covered in sticky jam-hands and dirt and spaghetti and a million other real-life stains!
I developed a system to keep it looking clean. We kept the couch covered with 3 blankets: 2 across the back, overlapping and one across the bottom! If we had a showing, I would carefully wrap up the blankets and store them. I’d fluff the pillows and off we’d go! When we moved out to Texas, we continued the same routine. Unless I had someone coming over, I kept it covered with the same 3 blankets! But after a while…….
**I COULDN’T LIVE LIKE THAT ANYMORE!!!!!!**
Crafty fool that I am, it was time to take action! I searched Pinterest (hands down, my favorite website). I was so “pinspired” by the different ways people have dyed or stained their couches! I was even tempted to tie dye it but finally, I decided to aim for a versatile Navy blue!
I did some hunting. I compared prices, I read reviews and finally, I took it as a sign that the Navy Blue Rit Liquid Dye was on sale at the Walmart nearest to me! 
NO GUTS, NO GLORY!
It takes guts to take a super clean White Sofa and change the color forever! I bought the dye and let it sit there for a week before I finally worked up enough courage to begin!
A couch is a big thing to dye! Lucky for me, all of my pieces were removable! The cushion covers, the back and sides; everything unzipped or unsnapped off easily.
For this project, I used:
3 Bottles Rit liquid dye, 8oz each
9 Gallons of Hot Water (3 gallons per 8oz bottle of dye)
3 Cups of Salt (I used classic Morton’s table salt)
2 Tbs Dawn Liquid Dish Detergent
1 big waterproof container
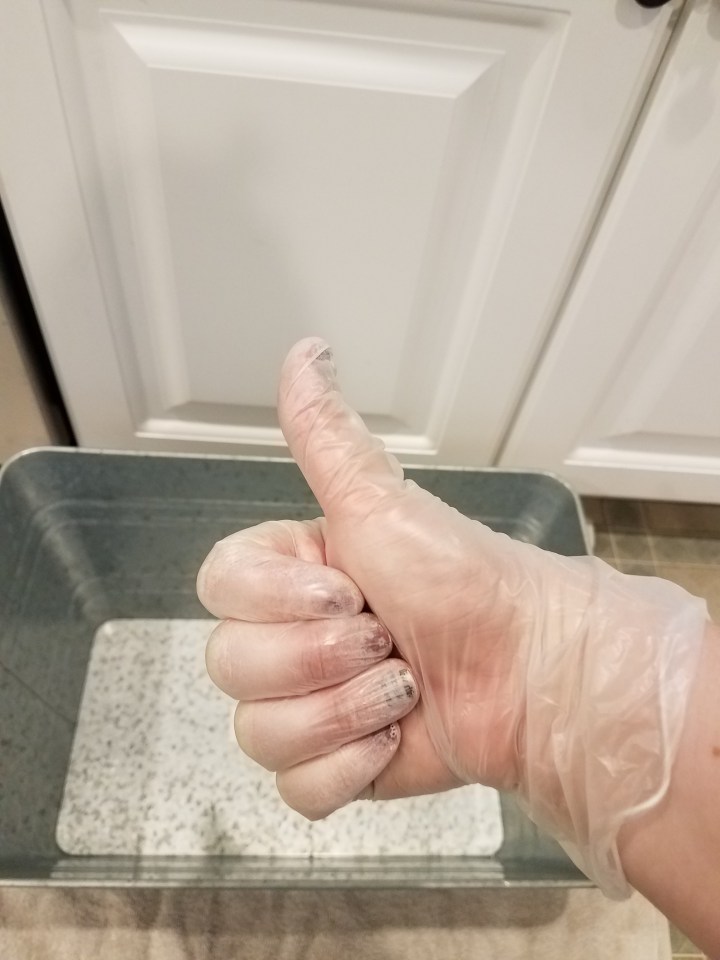
1 pair of Rubber Gloves
I used a big metal bucket. As cute as it looks, it was Not the best idea. 
Why not? Simple… that bad boy isn’t waterproof! Right after filling it up with hot water, it slow-leaked. For future dying projects, I will definitely use those plastic storage bins (they usually come with a lid and run $2-$6 at walmart). If you are looking for the right container, for this project, look for something dark colored, plastic, and deep. The dye will stain plastic, but for only a couple dollars, I don’t mind at all.
Could I have used my washing machine? Technically yes, but I couldn’t trust the result. I have a front loading washer and Rit actually provides helpful directions for dying items in the washer. You can find that info here.
Though they have hints on dying large items like couch covers and bedding in a washing machine they don’t always recommend it. The reviews I read all agreed: Dying large items in the washer usually results in Streaks! That’s why I went this route!
So I say, fill up your bucket with the water. Make sure it’s Hot!
Add in the salt and stir it up.
Pour in your liquid dye! (Want it darker? Add another bottle of dye!)
Finally, add the little bit of dish soap. Stir your dye mixture and you are ready to begin!
I used a long wooden spoon to stir my dye. Please know, this dye does it’s job. It will tint your skin, nails, clothes, etc. If you don’t want something dyed, keep it far away!
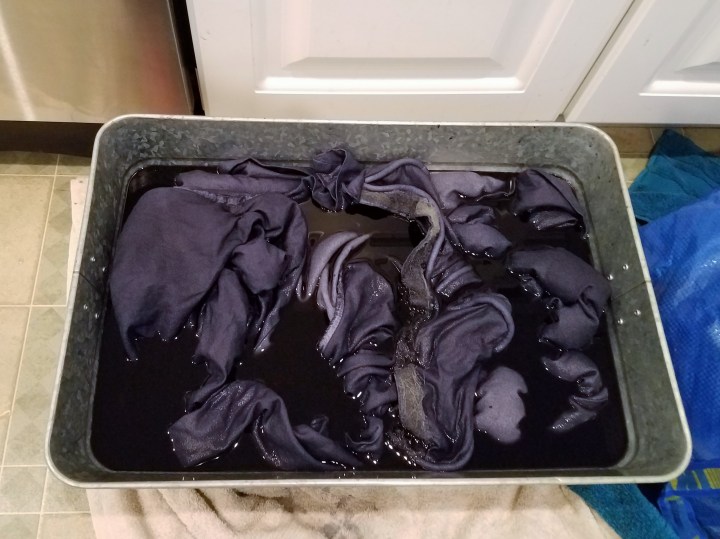
Here is my couch cover And cushions, all crumpled in the dye. I took this photo after only a minute of soaking!
My fabric bubbled up a bit. I used the wooden spoon and my gloved hands to mash down the fabric. I tried to get it as submerged as possible in the dye.
10 minutes later, I returned and stirred it around a little more! Again, I pressed the fabric under the water. I made sure there was no hidden part of the fabric that had not yet been soaked in dye.
I continued to let the fabric soak for a total of 1 hour. In truth, I soaked it until I LOVED the color that was showing up!
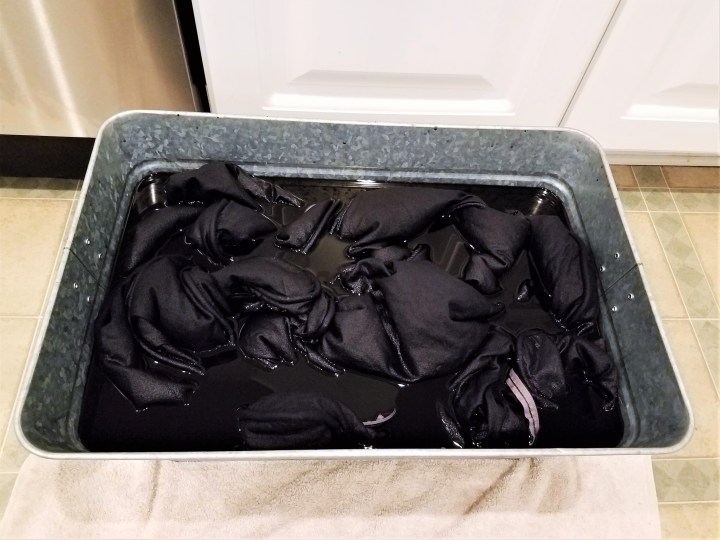
This was the fabric after an hour. The water, of course, had cooled, but i Loved what I was seeing!
The next step is to wash the fabric with COLD water. I am Not strong enough to transfer this big metal bucket of water and fabric. Instead, I Put on a fresh pair of gloves and reached for an IKEA bag (and more towels)!
Slowly, I lift each section and squeezed out the dripping water. I used gentle but firm pressure. Once squeezed out, I transferred the pieces, one by one, to the ikea bag. 
FIY, Ikea bags aren’t waterproof either!
*If you do this project in your laundry room, you won’t need a bag to transfer the fabric to your washer. Just squeeze it out and stick it right into your washing machine!*
Once all of the fabric was out of the dye, I placed it into the washer. I set the water temp to COLD and let it rinse out, then spin.
Finally, I dried my fabric. When I pulled it out of the washer, it was still quite dark. When I pulled the fabric out of the dryer, it was more of a faded Indigo.
That night, I stretched it back onto my sofa. My couch did not look Navy blue. It looked a Stunning purple! 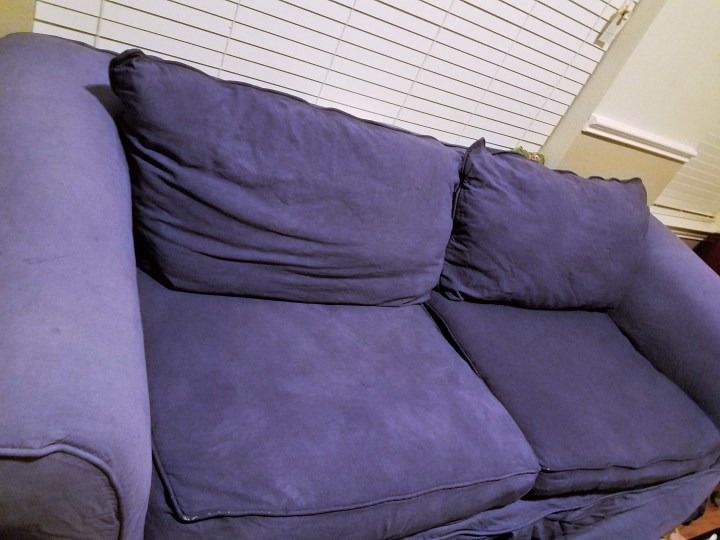
It didn’t disappoint me though. I love the way it turned out; I love it even more than navy!
There are so many beautiful colors out there to choose from! Why not add a little (or a Lot) of color to your living room?
If I did this project again, or if I wanted to make it darker, I would double the amount of liquid dye! The color has held up well and I highly recommend this project to any daring crafters out there, looking for a little change!
Condensed Instructions:
Pour Hot Water, Salt and Soap into a deep, waterproof container. Pour in the dye and stir it well!
Wearing rubber gloves, put your fabric into the dye water and make sure it’s soaked!
Let it “Dye” for a while; an hour or longer.
Squeeze out excess water and place fabric into washer.
Rinse and spin on COLD
Dry your fabric!
That’s it!
If you are brave enough to try this project, I’d love to hear how it goes!

